Lines and Colors, part 1
Hey kids. Welcome to Part One of my guide to how each page of The Specialists is created. In this installment we’re going to look at the analog portion of the process. Let’s dive right in, shall we? (All thumbnails in this post can be clicked to see larger versions of the images.)
Thumbnail Stage
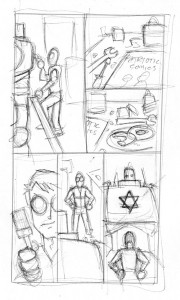
Shawn writes out each scene in a self-contained script. Scenes are as long as they need to be, but average from one to five pages. Shawn includes the details he deems are necessary, and leaves the rest for me to figure out. I take a script and, after reading through it a few times, start to try and visualize it in my head. I think about how it should be broken down into panels and what should be contained in each panel. Once I have a reasonable image of what I’d like to do with that page, I’ll try and replicate it with a thumbnail version. I’ll draw the thumbnails on a piece of paper and will try and get at least two pages per sheet (sometimes I’ll thumbnail out an entire scene in one go). The thumbnail version is quick and dirty, with very little in the way of detail, and will often be composed of little more than lines and squiggles that only I can decipher. What I’m doing here is just making sure that I have the right number of panels to portray what’s happening on this page, and that things seem to flow from one panel to the next. Once I’m satisfied with the overall design for the page, I’ll move on to penciling. Initial Pencils
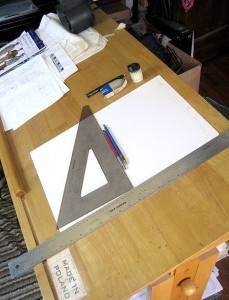
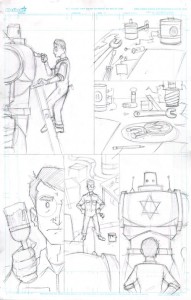
I pencil each page of The Specialists on 11″x17″ comic boards. They come pre-printed with borders in non-repro blue. With an eye on the thumbnail version, I’ll divide the page up into panels using a T-square and triangle; most of my page designs are fairly simple grid layouts. Once the panels are set, I begin drawing. For this stage I use a drafting pencil loaded with 4H lead.* I’ll sketch out the panels, usually starting with panel 1 and working my way from there. Sometimes, I’ll skip around and do the panels out of order depending on complexity—i.e. I’ll do the simple ones first as a way of warming up for the more complex ones. I’m not too concerned with details at this stage (see the background of panel 5), and will use my trusty circle and ellipse templates where necessary. It’s customary at some point in this stage for me to look at my progress and start to lose hope that it will come together in a way that will be at all usable. This stage (and the next) usually occupies the time I have set aside to work on Monday and Tuesday evenings (after dinner and before I go to bed).
*You can see my pencils in the photo. The red pencil uses the 4H lead, the blue contains 2H. I’ve had these pencils since I was in art school and don’t feel entirely comfortable using anything else.
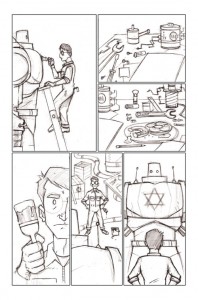
Tight PencilsOnce I’ve got all the panels sketched out sufficiently, I move on to finalizing the pencils. For this stage I switch to a drafting pencil loaded with 2H lead. This lead is the same as in a #2 pencil and is softer than the 4H lead used for initial pencils. I go over the initial sketches and add detail, clarify and maybe thicken some lines, use a ruler on straight lines where needed, and attempt to correct any glaring mistakes I feel I might have made. This is a process otherwise known as tightening up the drawing. This stage doesn’t usually take as much time as the previous—though it can, depending on how many details I’ve left out of the initial pencils. You’ll notice that panel 1 is completely devoid of a background. This is because I intend to add it in digitally with elements that already exist. This is about the time inking would normally fit in to the traditional comic-making process; I hate inking, I’m no good at it, so I don’t do it. I find I like the sketchiness of this particular style that I’ve developed, and that’s what I’ve stuck with, for better or worse. This concludes the strictly analog portion of the process, though I’ll include the next stage before moving on to the digital. Final Pencils
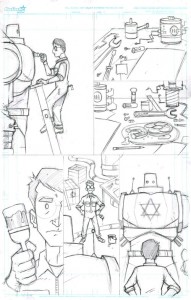
Now that the pencils are as close to done as I’m likely to get, I scan the page in. I have a letter-sized scanner and scan the page in three pieces. I used to have to then take the three images and stitch them together into one, a rather laborious process to be sure. I eventually discovered that Photoshop’s automated Photomerge action does a dandy job with no more effort on my part than pointing it to the three images and clicking OK. Once the final, composite page is ready, I perform what I call surgery. This consists of further correcting mistakes or adjusting size and placement of elements in a panel (notice in particular the size and position of the Golem in the last panel). I’ll paint over with white any stray construction lines and specks that may have been on the scanner glass, and then go through several different adjustment passes to darken and further tighten the pencils (for PS enthusiasts, this involves Levels, Brightness/Contrast, Curves (sometimes), and Desaturate—along with one or two other, proprietary steps). I’ll then create the panel borders using the vector rectangle tool, and set them to have a 5 pixel black stroke. For pages like this one, I create a white matte to mask any of the artwork that falls outside the panels by selecting the panel borders, reversing the selection and filling that area with white, on another layer.
We’ll move on to the digital portion of the process tomorrow. In the meantime, if there are any questions, just leave a comment and I’ll answer it the first chance I get. Thanks for reading.
(Continue reading with Part 2)
